

Rubber Paint for Roofs
Rubber Paint for Roofs
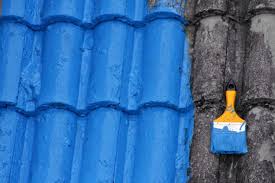
If you want to protect your roof from leaks, harsh weather, and sun damage, rubber paint is a smart choice. It creates a flexible, waterproof layer that seals your roof and shields it from UV rays and temperature changes. You can apply it yourself using basic tools, and it works on metal, flat, concrete, and some asphalt roofs. With minimal maintenance, it extends your roof's life—keep going to discover how rubber paint can benefit your home.
Key Takeaways
- Rubber paint provides a flexible, waterproof coating that protects roofs from leaks, UV rays, and severe weather.
- It can be applied to metal, flat, concrete, wood, and some asphalt roofs for enhanced durability and longevity.
- Rubber paint is easy to apply with a brush, roller, or sprayer, making it suitable for DIY roof maintenance.
- The coating reflects sunlight, improving energy efficiency and reducing cooling costs for buildings.
- Regular cleaning and inspection help maintain the protective membrane and extend the roof’s lifespan.
What Is Rubber Paint and How Does It Work?
Rubber paint is a flexible, waterproof coating designed to protect surfaces like roofs from moisture, UV rays, and temperature changes.
When you use rubber paint, you’re relying on its unique properties—elasticity, durability, and resistance to cracking—to create a long-lasting barrier. It forms a seamless layer that expands and contracts with your roof, so it doesn’t peel or blister when temperatures shift.
To apply it, you’ll use straightforward application techniques like brushing, rolling, or spraying. Make certain the roof is clean and dry before you start.
Apply the paint evenly to avoid thin spots, and let each coat dry thoroughly before adding another. This guarantees the rubber paint properties work effectively, giving your roof the protection it needs for years.
For those seeking reliable results, using top-quality products ensures the protective coating performs as expected and offers lasting value.
Key Benefits of Using Rubber Paint on Roofs
One of the main advantages of choosing rubber paint for your roof is its exceptional waterproofing ability. You’ll notice how it forms a seamless, flexible barrier that keeps leaks at bay, even during heavy rains.
Rubber paint stands out for its remarkable weather resistance, protecting your roof from harsh UV rays, temperature fluctuations, and wind-driven debris. This protection extends the lifespan of your roofing materials, saving you on costly repairs.
Another benefit is energy efficiency. Rubber paint reflects sunlight, which helps keep your home cooler during hot months. As a result, you may see a noticeable reduction in your energy bills since your air conditioning system won’t have to work as hard.
With these key advantages, rubber paint makes your roof more durable and cost-effective.
Types of Roofs Suitable for Rubber Paint Application
A wide range of roof types can benefit from a coating of rubber paint, making it a versatile choice for many homes and buildings.
If you have metal roofs, rubber paint is especially effective at sealing seams and preventing rust, helping extend the life of the structure.
Flat roofs are also excellent candidates since their surfaces are prone to pooling water and leaks; rubber paint creates a watertight barrier that keeps moisture out.
You’ll find that rubber paint works well on other common roofing materials, including concrete, wood, and some asphalt roofs, as long as the surface is clean and stable.
Always check compatibility with your specific roofing material.
Step-by-Step Guide to Applying Rubber Paint
Before you start, you’ll need to prepare the roof surface thoroughly and gather the right tools for the job.
It’s important to follow each step, from cleaning to applying the rubber paint evenly.
Don’t forget to account for proper drying and curing time to guarantee the best results.
Surface Preparation Essentials
Proper surface preparation is essential for ensuring rubber paint adheres well and creates a durable, watertight seal on your roof.
Start by inspecting the surface for debris, old paint, moss, or mildew. Use effective surface cleaning methods such as sweeping, power washing, or scrubbing with a mild detergent to eliminate all dirt and contaminants.
Allow the surface to dry completely, as moisture can interfere with adhesion. Next, address any cracks, blisters, or damaged areas by patching and smoothing them out—these surface preparation techniques help create an even base for the rubber paint.
Remove any loose material and sand rough spots for ideal results. By following these steps, you’ll maximize the performance and lifespan of your rubber paint coating.
Application Tools Needed
To apply rubber paint effectively, you’ll need the right set of tools and materials on hand before getting started.
Begin by gathering essential application tools such as high-quality paint rollers, brushes, and a sturdy paint tray. If you’re covering a large roof area, consider using a paint sprayer for faster, more even coverage.
Select rollers with a thick nap to handle textured surfaces and guarantee the rubber paint adheres well. Don’t forget painter’s tape to protect edges and gutters, along with gloves and safety glasses for personal protection.
Before use, double-check your preparation techniques—confirm all surfaces are clean, dry, and free from debris so your application tools work efficiently.
With these items ready, you’ll be fully equipped to achieve a smooth, professional rubber paint finish.
Drying and Curing Time
Once you’ve gathered your tools and prepared the roof surface, it’s time to focus on drying and curing times for rubber paint. After application, drying conditions play an important role in how quickly the paint sets. Ideally, you want warm, dry weather with good ventilation. Under best conditions, rubber paint usually dries to the touch within two to four hours.
Nevertheless, this is just the first stage. The curing process takes longer and is vital for long-lasting protection. Avoid walking on or exposing the roof to water for at least 24 to 48 hours, depending on the manufacturer’s recommendations.
Cooler temperatures or high humidity can slow the process. Always check the product label for guidance, and don’t rush—proper curing guarantees maximum durability and waterproofing.
Maintenance Tips for Rubber-Coated Roofs
To keep your rubber-coated roof in top shape, you'll want to clean it regularly and check for any signs of damage.
Remove debris and dirt to prevent buildup that could harm the coating.
Make it a habit to inspect for cracks or worn areas so you can tackle repairs early.
Regular Cleaning Guidelines
A clean rubber-coated roof not only looks better but also lasts longer. To keep yours in top shape, stick to a regular cleaning frequency—at least twice a year, or more often if you live in an area with heavy tree cover or lots of dust.
Start by removing loose debris like leaves and branches using a soft broom or leaf blower. Then, use mild cleaning products, such as a gentle dish soap mixed with water, to wash the surface. Avoid harsh chemicals or abrasive tools, as they can damage the rubber coating.
Rinse thoroughly with clean water to remove any soap residue. By following these simple guidelines, you'll help prevent dirt buildup and keep your rubber-coated roof performing at its best.
Inspecting for Damage
Keeping your roof clean makes it easier to spot early signs of wear or trouble. Conduct a roof inspection at least twice a year, or after severe weather, to catch problems before they escalate.
Walk the roof carefully, checking for cracks, blisters, peeling, or areas where the rubber paint is thin or missing. Pay close attention to seams, edges, and around penetrations like vents or skylights, as these are common weak spots.
During your damage assessment, look for standing water, mold, or discoloration, which can signal leaks or underlying issues. If you notice any damage, address it promptly to prevent further deterioration.
Document your findings with photos, so you can track changes over time and share evidence with a professional if repairs are needed.
Comparing Rubber Paint to Other Roofing Solutions
While there are plenty of roofing options available, rubber paint stands out for its unique blend of flexibility, affordability, and ease of application.
When you compare rubber paint advantages to traditional roofing material alternatives like asphalt roofing tiles, metal sheets, or tile, you'll notice some clear benefits. Rubber paint creates a seamless, waterproof membrane, reducing the risk of leaks. You can apply it directly to many surfaces, saving on costly labor and materials.
Unlike some roofing material alternatives that require specialized installation, you can apply rubber paint yourself with minimal tools or experience.
It's also more cost-effective, both upfront and over time, due to its longevity and low maintenance needs. If you're looking for a solution that adapts to roof movement and weather changes, rubber paint is a smart choice.
Frequently Asked Questions
Is Rubber Paint Available in Different Colors for Aesthetic Purposes?
You’ll find plenty of color options when choosing paint, so you don’t have to settle for basic shades. You can select colors that boost aesthetic appeal and match your style, making your project uniquely yours.
Final Remarks
When it comes to protecting your roof, Rubber paint is the answer.

